Optimizing Real World Data Collection: Enhancing the UX/UI of REDCap via Field Formatting
REDCap platform
Objectives for the Optimizing Real World Data Collection Tutorial Series
Overview
- Real World Data (RWD) - that is data accumulated outside of well-structured clinical trials - is an important source of clinical information that can help fill knowledge gaps that result from the highly-controlled setting of sponsored-intervention studies, such as randomized-controlled trials (RCTs)
- Data collection in the heterogenous environment of the “real-world setting” (RWS) is an important complement to sponsored-intervention studies
- RWD, while suffering from limitations in internal validity, often has superior external validity compared to RCTs
- Nevertheless, there are significant inherent challenges of collecting highly unstructured data in the real-world setting
- Therefore, strategies to facilitate the collection of RWD are sorely needed
- RWD, while suffering from limitations in internal validity, often has superior external validity compared to RCTs
- In this series of tutorial posts, we aim to provide a learning repository for readers to become familiar with available resources that can enhance Real World Data capture
- We will cover topics aimed at optimizing instrument development in REDCap to ensure a seamless user experience/user interface (UX/UI) for data abstractors, and cover built-in tools essential to managing quality control of captured RWD
Overview of REDCap
- REDCap is a user-friendly, web-based research electronic data capture platform utilized by researchers worldwide to collect structured data for statistical analysis.1,2
- It is a powerful, secure, and HIPAA compliant database building solution created by Vanderbilt University in 2004 that allows development and deployment of subject facing surveys as well as forms for data capture by data entry personnel
- Our lab has adopted REDCap as the data collection platform for our rare tumor patient registries. We have additionally deployed modules built in REDCap to streamline and analyze operations in the multidisciplinary clinic setting
Field Formatting Basics: Tutorial Overview
Key Points
- Creative formatting of fields can enormously improve the UX/UI for the subject taking the survey or the data entry person populating the form.
- After this lesson, you will:
- Understand the default appearance of REDCap fields and section headers.
- Appreciate advantages of customizing the formatting of REDCap fields.
- Understand methods through which one may customize formatting of fields in REDCap.
- Skill Level: Beginner
Overview of Formatting in REDCap
Default Field Formatting in REDCap
- An unformatted REDCap field appears as below: text without any indentation, on a gray background (the example below is a multiple choice, radio button field).

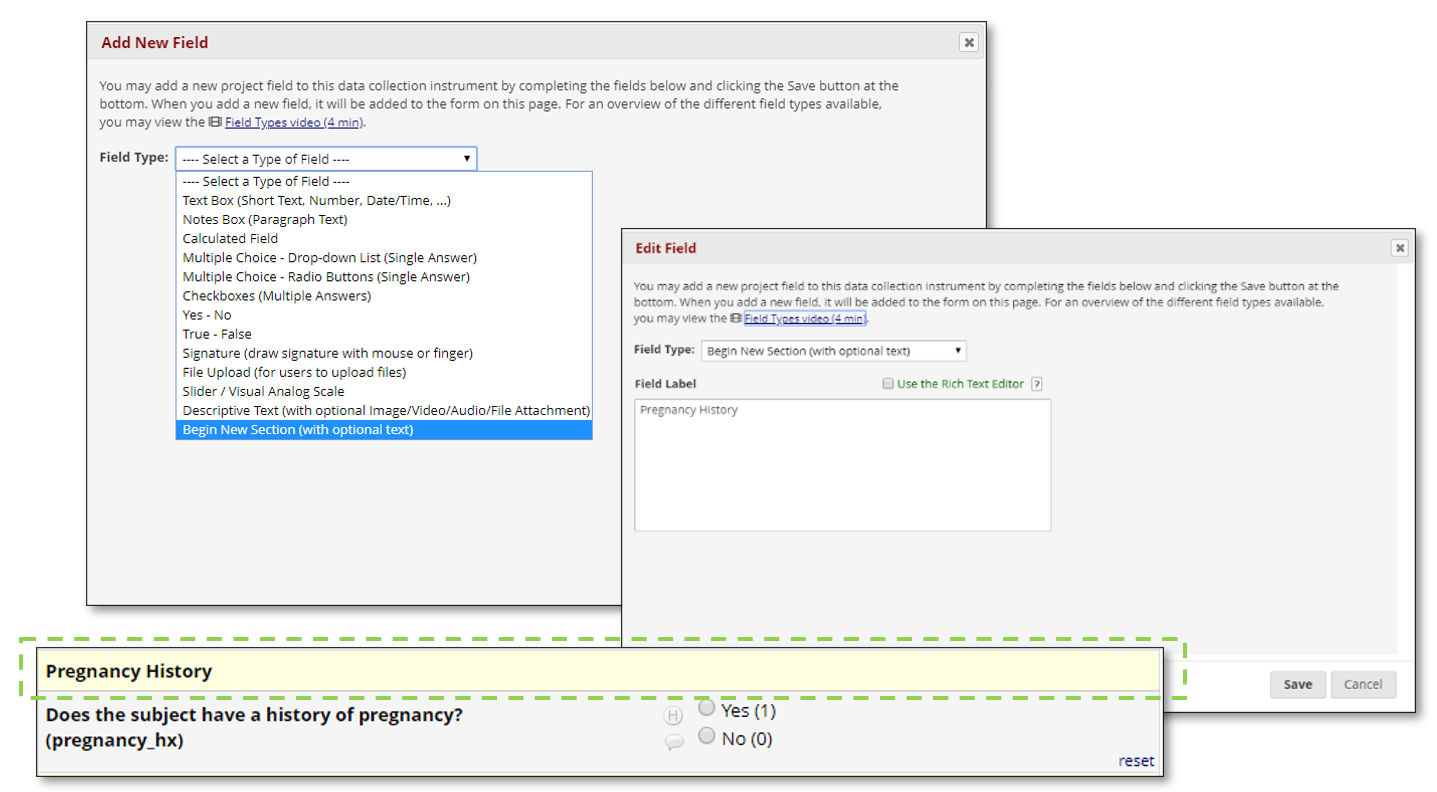
Section Headers
- Besides choosing from various other field types (including dropdowns, free-text with validation capability, checkboxes, sliders, and so on), you can create section headers that feature text on a light yellow background. These cannot be created as the final element in a form (i.e., in order for a header to be created there must be at least one data entry field below it).
- Section headers are not fields, and as such do not have an assigned field name, and cannot have their appearance conditioned on branching logic.
Uses for Formatting in REDCap
Creatively formatting your fields may greatly facilitate the user experience for the subject completing the survey or data entry person populating the form.
Particular purposes that formatting of fields may serve include:
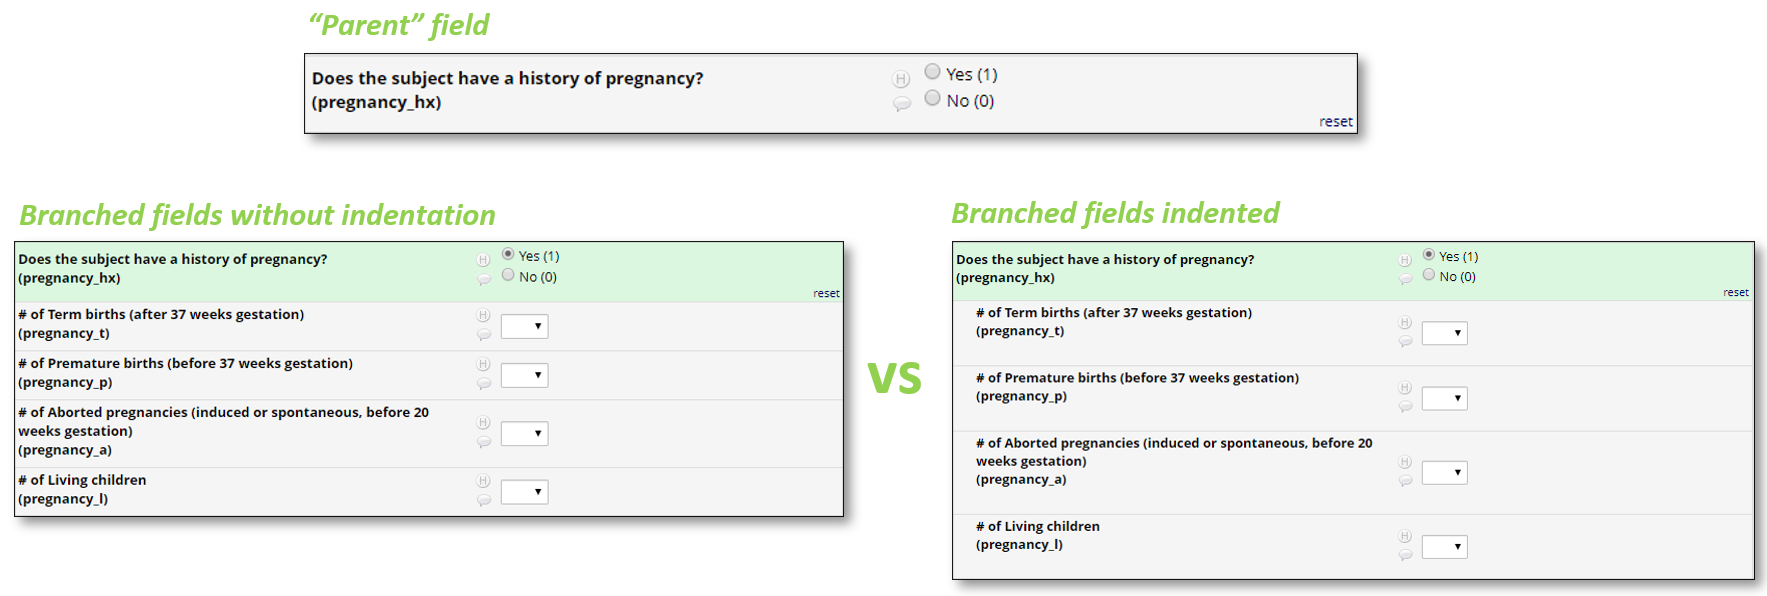
Visually reflecting the logic of the database architecture.
- For example, indentation may be deployed to reflect the branching relationship between parent and daughter fields.
- Creating a consistent visual language that simplifies user experience for the data entry person.
- You might develop a palette of background colors and border accents that reflects the function of certain fields. For example, you may decide to format descriptive fields that serve as “notifications” to the data entry person with an orange background and a red sidebar. You might decide to format all calculated fields with purple shading.

- Reducing data entry error by emphasizing elements of the field label with vivid colors or other styling.

- Creating section headers that obey branching logic along with their subordinate fields.
- Recall that the REDCap “Section Header” field type cannot be set up to obey branching logic. However, if we create a header for a set of subordinate fields, we would like for it to obey the same branching logic. This can be accomplished by formatting a descriptive field with a “light yellow” background color.

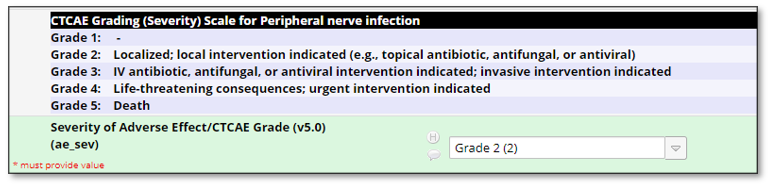
- Line breaks, tables, and bullet point formatting may used in descriptive fields to organize complex information guiding data capture in a manner easily accessible to the data entry person.
- And many other uses!
How to Format Fields in REDCap
In REDCap you may add formatting to your field text, including
- Changing font color or size.
- Bolding, italicizing, or underlining text.
- Adding indentation and justification.
- Changing background color.
- Adding border accents.
- Adding structure to text, including bullet points or tables.
- Adding hyperlinks to your text.
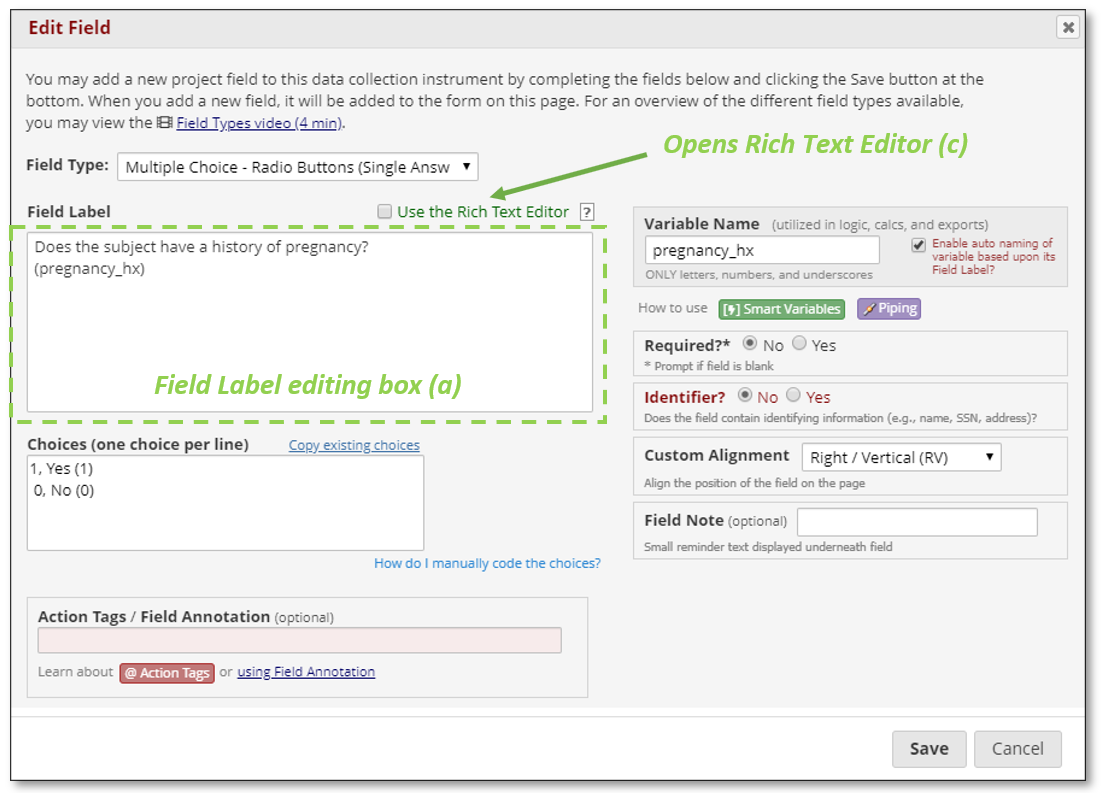
There are three ways to add formatting to field labels:
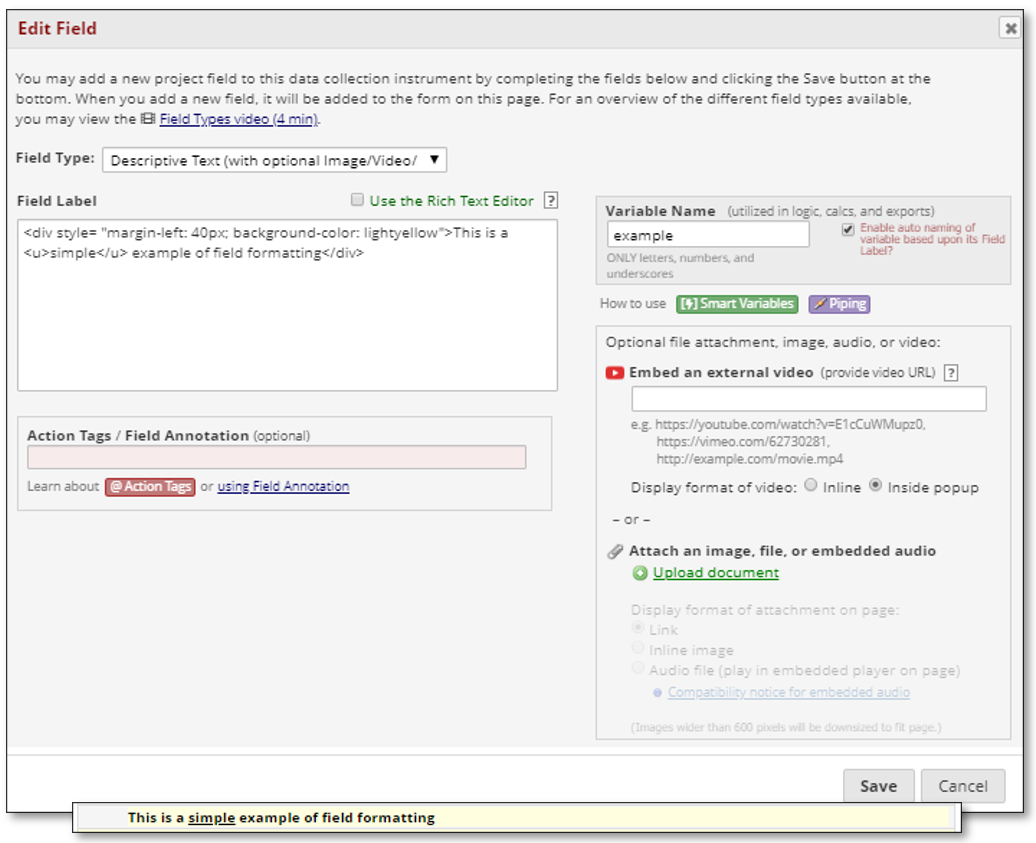
(a) You can directly add HTML or CSS elements in the Field Label editing box in the Online Designer.
- Representative example:
<div style= "margin-left: 40px; background-color: lightyellow">This is a <u>simple</u> example of field formatting</div>- Adjusts the left margin rightwards by 40px.
- Sets the background color to light yellow (matches the default coloring of the “Section Header” REDCap object).
- Underlines the word “simple”.
- We provide here links to excellent references that will guide you through the basics of HTML and CSS formatting, both generally and specifically in regards to deployment in REDCap.
- The chief advantage of directly marking up the text instead of using the Rich Text Editor is a closer level of control for select elements of formatting (for example, you will be able to adjust the degree of indentation by pixel through changing the margin-left parameter).
(b) Since the 7/26/19 update, you may conveniently add formatting through the Rich Text Editor in the Online Designer.

- Formatting changes appear in real-time in the Rich Text Editor.
- You may toggle out of the Rich Text Editor to view the markup by deselecting the Rich Text Editor checkbox, or click the “View source code” button to display the source code in a pop-up.
(c) You can directly add HTML or CSS elements in the field label column while editing your instrument in the Data Dictionary spreadsheet.
- Through the use of concatenation/decatenation, you can quickly add or remove opening and closing tags in multiple cells and thereby edit formatting for a series of fields in bulk.
Takeaways
- Field formatting in REDCap is a powerful way to customize the data entry experience of Real World Data
- Formatting may be created and edited in a variety of ways, most conveniently throught the Rich Text Editor in the Online Designer in REDCap
Next in our series of tutorial posts on Optimizing Real World Data Collection: Improving the UX/UI of REDCap via Branching Logic